Friday, July 10, 2009

Stampin' Up! SAMPLE FOLDER


I have put together a FULL sample folder!

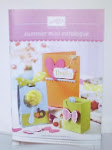
The SAMPLES are all from the 2009-2010 idea book & catalogue!

This includes one of every sample of ALL brads, ribbons, pretties kit, hodgepodge, accents & elements, clips, rhinestones, build-a-brad, buttons, hemp, twine, linen tape, twill tape, vellum, designer papers and card stock, all in there family's.
And one family of textured card stock just so your customers can see the texture first hand.

All printed on whisper white card stock and held together neatly in a folder!

This sample folder and your idea book & catalogue is all you need to show your customers! This folder shows them the TRUE color's & size!

This folder would cost $2,000 + if you were to get everything yourself to do this!
PLUS the hours of putting it together.

I am selling these SAMPLE FOLDER's with ALL the work done for you and shipped to your door for $300 each!

The vellum & card stock are punched using the tag punch, and the designer papers are all 5cm x 5cm samples!

Think how much this will boost your sales as your customers can see the products first hand!

This is a finished product & with permission from Stampin" Up! can be sold under the angle policy!

Payment methods by direct bank transfer, money order, cheque or cash excepted!

Once your payment has cleared, your SAMPLE FOLDER will take 7 days to be sent!

For my address, bank details or any further enquiries contact Cheryl Hayes @ stamp.n.witch@live.com or ph:- 0418-138-557.


Monday, July 6, 2009

Card fully open!


This is the card fully open!

Inside Bloomin' with Beauty card!

The card Stock inside the card is Ruby Red and Old Olive c/s.
The stamp You make my Life a Beautiful Thing is stamped in Chocolate Chip.
The Stamp is from A Beautiful Thing Stamp Set!
The pot of flowers is stamped in Black Stazon ink on Very Vanilla c/s and colored in using my Aqua Painter and Watercolor Crayons and inks!

Bloomin' with Beauty stamp set!


Last Bloomin' with Beauty card for awhile........ I really need to put this stamp set to the back of my cupboard as it is one of my favourites.......... could you guess?????? LOL ;-)
I will put extra pic's on as this card is folded in an accordion style!
The main card is Very Vanilla c/s, the 2nd layer is Ruby Red c/s, the 3rd layer is Old Olive c/s and the top layer is Very Vanilla c/s.
I sponged the edge in Chocolate Chip, the flower is stamped in Black Stazon ink and colored using Summer Sun and Pumkin Pie inks, the steam and leaves are colored in using Glorious Green and Green Galore inks using my Aqua Painter!
The Ribbon is from my own stash........ NOT Stampin' Up!

Bloomin' with Beauty Stamp set


The main card is Confetti White c/s, I stamped the flower on Vellum c/s with Black Stazon ink, the edges have been sponged with Rose Red ink, the flower was colored with Regal Rose and Rose Red inks using Blender Pens, the steam and leaves were colored in Old Olive using the same method.
Bloom is stamped in Rose Red ink.
The Ribbon used is 5/8" Bravo Burgundy Grosgrain Ribbon.
I just LUV this card! You can do sooooo much with this Stamp set!

Anoth carder Bloomin' with Beauty


Another Bloomin' with Beauty card......I JUST LUV this stamp set!
The main card is from Kraft c/s, the 2nd layer is Bashful Blue and was stamped in Brilliant Blue using the Sanded b/g stamp.
The smaller blue c/s is Brilliant Blue and was sponged around the edge with Close to Cocoa, the final layer is Very Vanilla c/s, the verse was stamped in Close to Cocoa and the flower was stamped with Stazon ink, the flower was colored in using Aqua Painter and Watercolor Crayons, the Ribbon is Taffeta Ribbon in Kraft color.

Sunday, July 5, 2009

Bloomin' with Beauty card open!


Here is the Bloomin' with beauty card open!
It is ideal for photo's, short msg's, etc.
One you can carry around with you in your purse!
Hope you enjoy it!
Thanks for looking!

Bloomin' with beauty with out band!


Here is the same card without the belly band on!

Bloomin' with Beauty fold card!


The Stamp set used is Bloomin' with Beauty!
The main card is Pale Plum c/s, the band is Lavender Lace and Orchid Opulence.
I stamped the pot of flowers onto whisper white using Black Stazon and I coloured them in using my Aqua Painters and my Watercolor Wonder Crayons!
This card opens out into a gorgeous photo card!
I will put a pick up of it open!

Bloomin' with Beauty Stamp Set!


The Stamp set used is Bloomin' with Beauty and all I did was stamp all my images in Basic Black ink on coloured c/s.

The base card is very vanilla c/s, the middle layer is Always Artichoke c/s and the top layer is Sage Shadow c/s.

The bea was stamped on yoyo yellow c/s

The pot was stamped on Ruby Red c/s

The flower's were stamped on Lovely Lilac c/s & the leaves were stamped on Old Olive c/s

A statement on the top left hand corner and your done! Quick and easy card!

Wedding Invitation


My Auntie made this card as a sample for my cousins Wedding Invitation so I just had to case it!
The Stamp Set used was Embrace Life!
The main c/s is Blush Blossom, gold embossed the flowers and the single large flower is on Cameo Coral c/s embossed in gold.
The card opens in the centre.
Just luv this card
Thanks Auntie carol!

Friday, July 3, 2009

STAMP CLUB!

I am starting to run a STAMP CLUB, day or night, your place or mine!
If you are interested in getting 6 friends together once a month for 6 months for a couple of hours of STAMPING and CREATING fun!
Contact me ~ Cheryl 0418-138-557 or by email:- stamp.n.witch@live.com
OR
If you would like to put your name down to join a group of stamper's PLEASE contact me for more details!

Everyone will get a turn at being the Hostess..... so everyone will get the benefits of FREE products over the time of the STAMP CLUB!

Simple & Quick


Can use as a card or a gift card/voucher holder!
Simple BUT effective!

Simple & Quick


A very Quick and Simple card today......
Card Stock used is from the 2009-2010 In Color ~Baja Breeze,
The Designer series paper is also from 2009-2010 collection ~
Pacific Point!
I VersaMark the base card with Eastern Bloom Stamp Set.
The Congratulations New Baby Stamp is from the Fun & fast Notes Stamp Set and was stamped in Brilliant Blue.
The Ribbon slides off to open the card!
And I have put a pocket inside for a gift voucher!
I made it to look like a present!

Thursday, July 2, 2009

Rustic Rooster card!


I decided to try the WAX paper technique, only I did 4 colors!
After Ironing the WAX paper on the glossy card I brayered the first layer of ink in So Saffron, I then Ironed another piece of Wax paper and the 2nd color ink I used was Regal Rose, yet another Wax paper and my 3rd color was Lovely Lilac, my last Wax paper and my last color was Bravo Burgundy ink.
The base card is Kraft stamped with the sanded b/d stamp and I used Close to Cocoa ink, the following layer of card is Chocolate Chip and I distressed the edges with my Cutter Kit Tool and turned up 2 of the corners.
I then stuck my Coloured Waxed Gloss paper onto the Chocloate Chop c/s.
Ribbon I used was 5/8"Chocolate Chip, I also used an eyelet from last years earth elements eyelets. The orange c/s is from this years In-Colors~ Tangerine Tango and was stamped with Bravo Burgundy ink and sponged the edges with Close to Cocoa.
All stamps are from the Rustic Rooster stamp set except for the With Love~ it is from the Yummy stamp set and was stamped in Really Rust!
I used Stampin' Dementionals on the Rooster.
I am happy with the Wax Paper effect and can see myself using it more often.
Let me know what you think!
Thanks for looking at my blog!

Envelope Book Open


Envelope Book open view!
I haven't decorated the inside of the Envelope Book as I will wait and see what or whom I use it for!
Fun to make a joy to give!

Envelope Book


Just Luv this gorgous little Envelope book!
I used book-board for the front and back cover's, covered them in Designer Series Paper from Raspberry Tart!
Just luv that pack of paper's!
The spine is Pale Plum c/s
Whie Taffata Ribbon.

Spring card open!


Here is my Spring card open!

Spring Card


Here is my Spring card!
Base card is Very Vanilla c/s, other c/s used is Pixie Pink and Ballet Blue.
Stamp used is from A Happy Heart Stamp set.
Inks used are Pixie pink and Brocade Blue.
I stamped 2 hearts, 1 in Pixie Pink and 1 in Brocade Blue then cut them in half. Even got them to line up.....lol
Sponged around the top edge of the card!
Wah-lah done!

Tuesday, June 30, 2009

Organic Grace Stamp set!


I used Kraft c/s for the base card, the front of the card is in Blush Blossom c/s. I used the Eyelet Punch down the opening of the card, I also used the same punch on a strip of Chocolate Chip Designer Series Paper and adhered it to the inside of the card after sponging the edges with Close to Cocoa.
I masked and stamped the leaves in Mellow Moss ink, the flowers are stamped on Very Vanilla c/s in Perfect Plum and the top centre flower is on dimensions to give it a lift.
The dragonfly is stamped on very Vanilla with Sahara Sand ink and I only stuck it down by the body and lifted the wings to give it a look of flying.
The Best Friends is from Garden Whimsy stamp set and was stamped in Pale Plum and sponged with Mellow Moss.
A VERY soft and beautiful card for a gorgeous friend!
SORRY for the side shot AGAIN, I am trying to work my phone out so I don't have to print my pic's every time I want to up-load them!

Sunday, June 28, 2009

More Chocolate Cake!


Yummy..... Chocolate Cake and Strawberry's!
I used Choc Chip c/s for the cake and the Red with small black spots on it, out of the Holiday Treasures Designer Series Papers for the Strawberry's, The leaves are made out of Garden green c/s.
I sponged the edges of the leaves in Garden Green.
I also used Linen Thread, which I should have died with
Garden Green But didn't think of it at the time!
I think Green Linen Tread would make it look more like the stem on the strawberries~Don't you think????
Hope you like it!

Yummy Chocolate Cake hmmmm


Here is the top view of my Chocolate cake I have made with a small gift inside each piece for my Open Home on the 9th July!
Dressed with Strawberry's on top!
Who can resist Chocolate cake and Strawberry's????
Hope you like it!

Friday, June 26, 2009

Sketch Challenge 1


Here is a sketch Challenge I did from Alisa Tilsner blog-sketch Challenge 1.
I used Real Red, Brilliant Blue and Very vanilla c/s.
I used Embrace Life stamp set and Versa-mark the back ground of the main card. The single flowers are stamped in Boardering Blue, Real Red and So saffron, I masked and then sponged these flowers and the 2 Real red ones have been put on with Dementions
For you stamp is from One of a Kind Stamp set and stamped in boardering Blue I'm not sure if I like it yet!

Wednesday, June 24, 2009

Changed the Bikini to a Corset!

I thought I'd have a go at a 3d corset!
I used black c/s for the base of the card, Pink Passion c/s for the bottom part of the corset along with vellum over the top stamped in Whisper White using the Boho back ground stamp set. I used the Gel Pen for the sew lines and did the top section only in vellum stamped in Whisper White with the Boho back ground stamp.
I even put the darts in to make it 3d.
I think next time I will have to put the pink under the top section as well!
What do you think???????

My Bikini


Here is my Bikini!
I used Black c/s as the base card and Pink Passion c/s for the bikini, The Pink Passion is stamped in Versa-mark using Boho back ground stamp set and a clear Rhinestone from the Pritties kit for the belly ring.
EASY but cute!

My 1st challendge


Here is my first challenge I have contributed too. The colours are Rose Red, Perfect plum, Old Olive and Whisper white, I just luv these colours together!
I used All Scallops stamp set to stamp along the bottom of the card in Whisper White, I then used the Scallop edge punch, I then Versa-mark the background of the card (all 3 colours) with Embrace Life Stamp set.
I stamped the single flower from Bloomin with Beauty stamp set in Rose Red on whisper white c/s and then just sponged the flower to give a soft look. I used Dimensions to give it a lift also. The ribbon slide is from the silver Hodgepodge Hardware and the ribbon is 1/4" grosgrain in Old Olive.

Tuesday, June 23, 2009

Going outside the square!


I have gone outside my comfort zone today and done something differant!
The scane doesn't do much for it!
I accually like the way it turned out!
I stamped the leaves from Lovely as a tree Stamp Set in Garden Green using my Stamp-a-ma-jig then stamped over the top of it with Versa-mark then embossed it with clear.
The same has been done for the other 2 leaves only 1 in Really Rust and the other in Close to Cocoa.I then spondged the edge of the Very Vanilla c/s with Old olive. I stamped the One of a Kind in Old olive and sponged the edge in Really rust.
The I matted the Very Vanilla with Really Rust c/s and cut the 4mm bigger! Then put on to Chocolate Chip c/s.The main card is Very Vanilla and stamped in Old Olive using the Sanded b/g stamp.
I then decided to use my blender pen and chalked the leaves to give them more colour. Giving it a real Autum feel.

Monday, June 22, 2009

Earn extra products in June & July


Would you like to earn extra products????
Who wouldn't!!!!!!!!
If you hold a workshop in June or July and your workshop totals $600, you'll receive an additional $40 in hostess awards.
Thats $110 worth of FREE products and a level 1 or level 2 Hostess stamp set FREE!
Have an afternoon or evening fulled with fun and friends!
Call me and book your workshop!
Cheryl -0418-138-557

No Calorie Cake.....lol


Here is my cake I have made for my guests that come to my Open home on the 9th July 2009.
Each guest will get a piece if cake and each piece has a small gift inside.
I will make a chocolate one as well!
Hmmm..........Yummy........... I think anyway!

Open Home 9th july 2009


Here is one of the flowers I have made for my cake!
I used the scallop circle punch and folded and unfolded then and then stuck in place!
I used the 5 petal punch cut into singles for the leaves!
I THINK they are just gorgous!
I will be back to show my cake later on today!

Another card to match my exspanding file!
Main card is Regal Rose, Very Vanilla and Certainly Celery c/s, stamped using Bloomin' with beauty Stamp Set using Lovely Lilac ink for flower and green galore ink for flower stem.
White Gel Pen used to draw stitch line at top of card.
Pattern Paper from Raspberry Tart Designer Series Paper and topped with 5/8" Regal Rose Ribbon.

I luv these colours and paper so much I had to make a couple of cards to go in my exspanding file!
Regal Rose is the main card colour, Certainly Celery c/s torn under desinger series paper from my exspaning file...... just to match
So thankfull words is from Level 3-window dressing stamp set, stamped in Pixie Pink.
Butterflys from Garden Whimsy Stamp Set stamped using the rock N roll tecnique in both Pixie pink and Lovely lilac inks on very vanilla c/s.
Scallop edge punch and a pink stample to finish off.

Here is the inside of my Exspanding File!
This would be gr8 as a gift full of handstamped cards
OR
use as a recipe file, or personal papers!


Here is my Expanding File, I have been meaning to make one of these for soooooo long, BUT kept putting it off thinking it was for the too hard basket.........
WELL was I wrong......... soooooo EASY to make!
I used book-board and covered it with Raspberry Tart Designer Series Paper and Rose Red c/s outside.
I used Regal Rose c/s for the inside covers.
Certainly Celery c/s for the Accordian sides and Very Vanilla c/s for the Deviders.
I also used a Silver Hodgepodge with Regal Rose in this on the front.
To keep it closed I simply used sticky velcro.
I am VERY HAPPY with the way it turned out!
I will put a pic of the inside for you to see.

My little PIZZA box is made from Close to Cocoa c/s, I used the Scallop Edge Punch to cut the Cameo Coral colour card for the sqallop square top and the sqallop edge sides.
I have matted the Holiday Treasures Designer Series Paper on Very Vanilla and Close to Cocoa c/s.
I luv this cute little box and you could use it for many a little gifts........hint.....hint DEAR :-)

NO colouring done on this card......... just stamped with Black Stazon Ink on Pixie Pink c/s for single flowers, Garden Green c/s for the flower steams and leaves, Lovelt Lilac c/s for the pot full of flowers, Really Rust c/s for the pot.
Very Vanilla, Pixie Pink and Lovely Lilac c/s for the layers of card.
I used the spiral punch to give a torn out look and the slit punch to hold the bloom c/s, 2 Green Galore Brads!

Another card using the Bloomin' with beauty stamp set!
The colours I have used is Very Vanilla and Perfect Plum c/s.
I used the Aqua Painter and the Watercolor Crayons to colour in the flowers and bee.
The ribbon is 5/8" Certainly Celery Grosgrain Ribbon and I used a flip top off a can of soft drink!

Here is the Bloomin' with Beauty card open!

All the Pink card stock is Regal Rose, I have used Bloomin' with Beauty stamp set and stamped using Black Stazon Ink, I coloured all the flowers and pot using Stampin' Pastels and a combination of the Aqua Painters and the Blender Pens.
Always Artichoke is the c/s behind the verse.
I will so you a pic of this card open!

This would have to be one of my NEW favorite stamp sets........... I LUV ROASTERS!
Level 2 Stamp set - Rustic Rooster.
Creamy Caramel c/s, stamped back-ground in creamy caramel.
Rooster is stamped in close to cocoa on really rust c/s.
Very Vanilla card edge is sponged with Always Artichoke, the swirl is also stamped in Always Artichoke. The grass is stamped in Glorious Green.

OK ....... it's time for some cards now!
Level 3- Window Dressing stamp set!
I used Ruby Red c/s to make my bricks and used the White Gel Pen to mark the lines, Cram caramel c/s was used for the shutters, Yoyo Yellow c/sfor the top of the window, Very Merry Christmas was stamped and embossed in gold. The little girl was stamped in Stazon and coloured using water crayons and Aqua Pen. The christmas tree was stamped in Glorious Green from Lovely as a Tree stamp set, Whisper White c/s torn for the snow, snow-men stamped in Stazon and coloured using water crayons.
I used gold and silver brads for lights on the tree!
I just LUV Christmas!

I needed something to keep my cards in that I have on hand ready to use!
I did see this idea somewere BUT I am sorry I can not remember were or from whom!
I pulled apart an envolope and made the gusset to hole 6 cards each........ depending on brads used of course.
I made the holder to hold 4 card storage box's BUT have also made the pattern bigger so it can hold 6 or 8.
I used Bold Brights c/s in Green Galore, pixie Pink, Summer Sun from Earth Elements, Taken with Teal from Rich Regals, the box holder in done in Lovely Lilac. I used a Silver Hodgepodge on the front and used my label printer to right cards! I used Say it with Scallops stamp set and punched them using the Scallop Square punch. I also used Very Vanilla c/s and sponged the edges in contrasting colours. On each card holder I used VersaMark and stamped with Embrace life stamp set.

Here I have made a Ribbon Album, I used a sheet of Designer Series Paper from Holiday Treasures and cut the cover from book-board, I put 10 pages in using whisper white c/s and held them in place with Taffeta Ribbon in Very Vanilla, Kraft, Chocolate Chip, Mellow Moss and Pretty in Pink, 2 of each colour. I also made a flap to help hod it closed, I used the Round Tab punch and folded it in half for extra strength, I used Regal Rose c/s as I also used it for the inside of the covers.
You could decorate the pages OR make them into pockets for keep-sakes!
Just LUV this paper!

Here is the pic of the box with the lit open, you simply slid the lid upwards!

Here I made an ALL in one box and lid from Holiday Treasures Designer Series Paper! This box is sooooo easy to make and the double sided paper makes it even easier! I exstended the top to make the box taller! This one is made from one full sheet of 12 x 12.
I also used the sqallop edge punch for the edge of the lid!
My Auntie was given a box of chocolates for Christmas so we pulled the box apart to see how it was made........... AND.............NOW we can make them too!
Hope you like this idea!
We thought it was clever!
I will also post a pic of the box with the lid open.

Here's another one I had fun making and truely luv as well.
I got the pattern from www.scrapbooktrendsmag.com once again I have changed the way it opens and once again it would make a lovely invite for a wedding or even a deb-ball.
I used Basic Black c/s for the jacket, I also stamped in versa-mark on the jacket collar using the sea-weed from ocean commotion stamp set so it looks like it is velvet, (hard to see in the photo) 2 plain black buttons, whisper white for the shirt with black brads as the buttons and 5/8" grosgrain ribbon in real red for the bow tie.

I used this idea from Janine Tinklenburg, only I have changed the way I did the card, as I have made mine free standing and I also made my dresss from Vellum and stamped it with whisper white using the Boho backgrounds stamp set, the leaves are punches from wild wasbi from last yrs In-colors, I used the 5 leaf punch from spring flower bouquet punch, I made the roses from using a CP1 4 leave clover punch. The body is Blush Blossom c/s, I also used the sqallop circle punch in Pale Plum as the base for the flowers. The ribbon is Whisper White Taffeta Ribbon. I used the sqallop edge punch for the front heam of the dress only.
I truely Luv this card and what a gr8 wedding invite it would make!
Hope you like it!

Finerly Here!


We have moved!
I have finely got this thing working.........well I hope so anyway!
This is my first post on my blog!
The photo for this card does not do it justice...... NOT the true colours, I used Always Artichoke as my base card and stamped it with Always Artichoke ink using sanded background stamp, then I put close to cocoa c/s thro my crimper, I cheated and photo copied the map onto whisper white c/s, The ute from loads of luv stamp set was stamped on cameo coral with stazon ink and the wheels are antique brass jumbo eyelets, the furniture is stamped on rose red c/s along with the base tag. The just moved is stamped in always artichoke and sponged around the edge! NOTE myself, Nutmeg (my dog) in the front and we put hubby in the back!
I have used a green galore brad to show were we now live!